Deploying with Foundry on Cuckoo Chain
This tutorial will guide you through deploying an ERC20 token on Cuckoo Chain using Foundry. Foundry is a Rust-based smart contract development toolchain that manages dependencies, compiles projects, runs tests, deploys, and allows interaction with the chain via command-line and Solidity scripts.
Given Cuckoo Chain's foundation on the Arbitrum and Ethereum Stack and its EVM compatibility, Ethereum-based smart contracts can be ported easily with minimal adjustments.
Prerequisites
You need to complete the following steps, which should take around 10 minutes:
-
Get $CAI on Cuckoo Testnet Network: Use this faucet to claim some CAI.
-
Install Rust: If Rust is not installed, follow this guide.
-
Install Foundry: If Foundry is not installed, follow this guide.
Let's get started!
Step 1: Setting Up the Project
1.1 Initialize a New Foundry Project
Open a terminal and run:
forge init my-project
1.2 Install OpenZeppelin Contracts
Add the OpenZeppelin contracts library to your project:
forge install OpenZeppelin/openzeppelin-contracts
Step 2: Writing the ERC20 Token Contract
2.1 Create the Contract File
In the /src directory, create a file named MyERC20.sol and add the following code:
// SPDX-License-Identifier: MIT
pragma solidity ^0.8.0;

import "lib/openzeppelin-contracts/contracts/token/ERC20/ERC20.sol";

contract MyERC20 is ERC20 {
    constructor() ERC20("MyToken", "MTK") {}
}
This simple ERC20 token is named "MyToken" with the symbol "MTK". You can modify the name and symbol as desired.
Here's what your project should look like so far:

Step 3: Building the Contract
3.1 Compile the Smart Contract
Use Foundry to compile your contract:
forge build
Step 4: Deploying the ERC20 Token Contract
4.1 Deploy the Contract
To deploy your contract, run the following command, replacing <YOUR_PRIVATE_KEY> with your actual private key:
forge create --rpc-url https://testnet-rpc.cuckoo.network --private-key <YOUR_PRIVATE_KEY> src/MyERC20.sol:MyERC20
Never share your private key publicly. Store it safely to prevent unauthorized access.
Optional: Verify the Contract During Deployment
Add the --verify flag to verify your contract during deployment:
forge create --rpc-url https://testnet-rpc.cuckoo.network --private-key <YOUR_PRIVATE_KEY> src/MyERC20.sol:MyERC20 --verify --verifier blockscout --verifier-url https://testnet-scan.cuckoo.network/api\?
You should see an output similar to this:
[⠢] Compiling... No files changed, compilation skipped
Deployer: 0x3F26b51E23D01b09f4079B2a9e00e6873a8409D8
Deployed to: 0x628F56856386A4De8414A4D8217D519bF94d03f0
Transaction hash: 0xbe2d27554f130a720c4dd82dad055c941ca44dee836f6333a8507d76022c158
Copy and save the "Deployed to" address for later use.
Step 5: Verifying the Contract After Deployment
5.1 Verify the Contract
For contracts already deployed, use the verify-contract command:
forge verify-contract <CONTRACT_ADDRESS> src/MyERC20.sol:MyERC20 --verifier blockscout --verifier-url https://testnet-scan.cuckoo.network/api\?
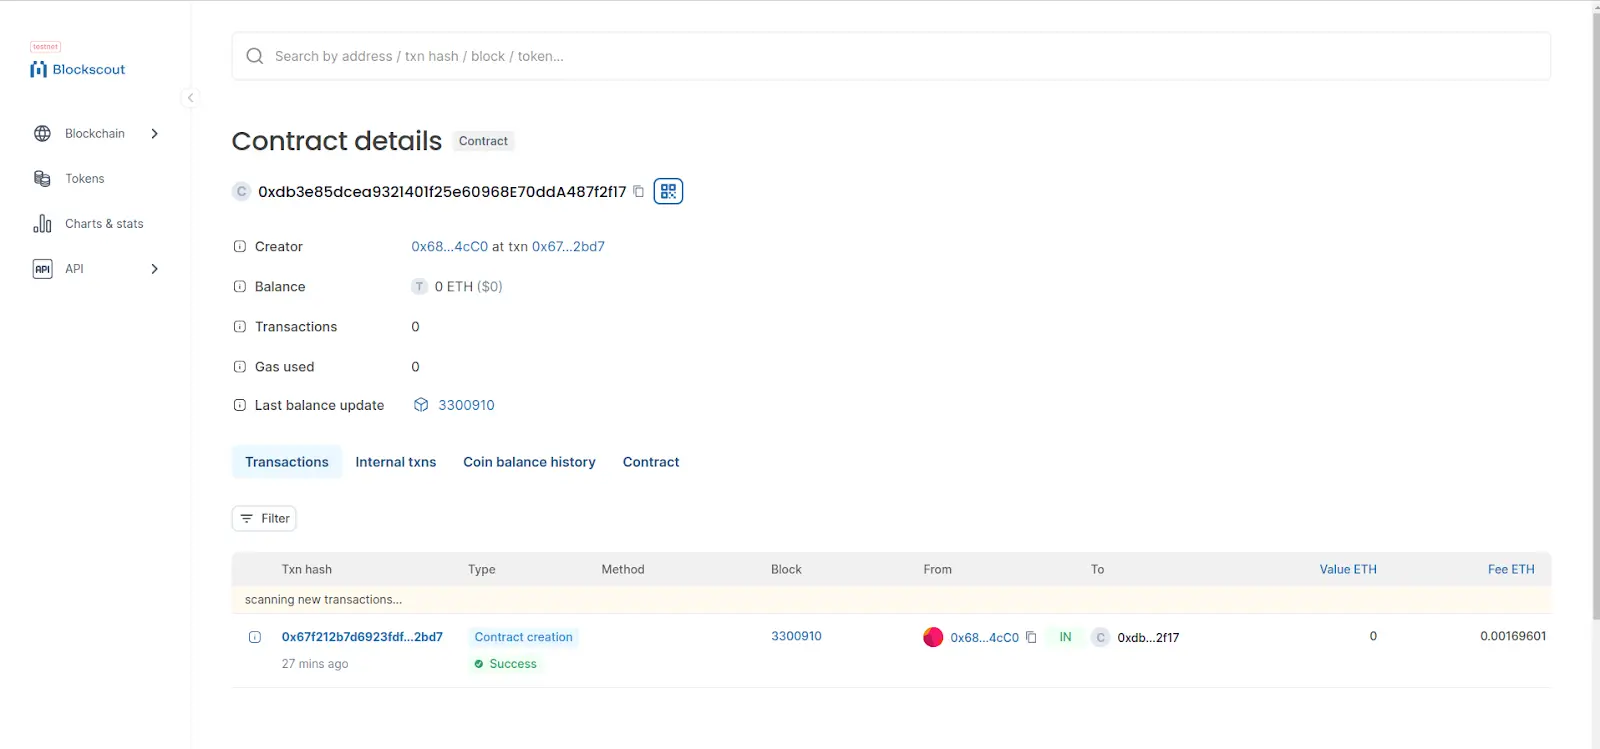
Step 6: Interacting with Your Deployed Contract
Use Blockscout to view your contract's details. Paste the contract address from the deployment output into Blockscout's search bar. In the "Contract" tab, you will find your verified contract.
Congratulations! You've successfully deployed and verified a smart contract on Cuckoo Chain using Foundry.
To learn more about Cuckoo Chain and explore business opportunities, join our Discord and say hello 👋.